A freshly baked loaf should feel soft and slice cleanly, not crumble into a dry pile. That is what I want from zucchini bread, especially when a busy day leaves little room for fussy baking. Could a simple batter really give you two dependable loaves with a tender center?
This recipe is a straightforward quick bread, a bread made without yeast that rises with baking soda or baking powder. It makes two loaves with a soft crumb and warm cinnamon flavor, using familiar ingredients and an easy mixing routine. You do not need to peel the zucchini or squeeze it dry for this recipe.
I like this approach for busy home cooks because it keeps the steps simple without sacrificing texture. The batter does not call for special equipment, and the zucchini helps keep each slice tender. You can leave out optional add-ins or choose the ones your household enjoys.
Gather familiar pantry ingredients, and you can make the batter without a complicated shopping list. Start by checking what you need.
What goes into this two-loaf recipe?
Set out the flour, sugar, eggs, oil, and zucchini before you start, so the batter comes together without a mid-recipe pantry search. This recipe uses everyday baking ingredients, with chopped nuts as an optional extra.
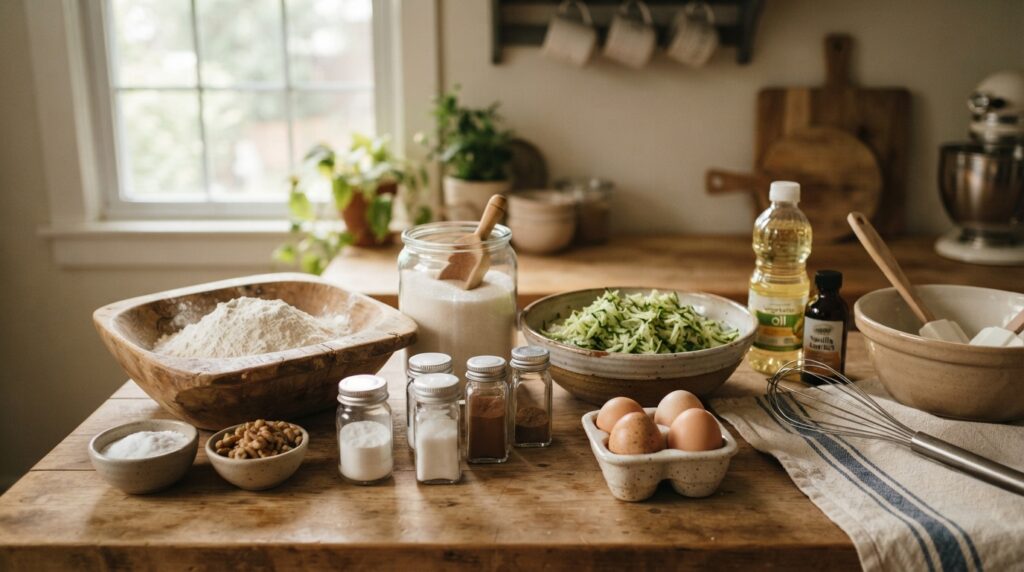
The core batter ingredients
Measure these ingredients before mixing. The dry ingredients go in one bowl, and the wet ingredients go in another.
- 2 cups all-purpose flour
- 1 1/2 cups granulated sugar
- 2 teaspoons baking soda
- 1 tablespoon cinnamon
- 1 teaspoon salt
- 3 large eggs
- 2 cups grated zucchini
- 3/4 cup vegetable oil
- 1 tablespoon vanilla extract
- Optional: 1 1/2 cups chopped walnuts or pecans
Flour gives the loaf structure, while oil and zucchini contribute moisture. Eggs help bring the batter together, and baking soda gives the quick bread lift. Cinnamon and vanilla add warmth, so the finished loaf tastes gently spiced rather than plain.
Could I use brown sugar instead?
This version uses granulated sugar, not brown sugar. If you searched for a “moist zucchini bread recipe with brown sugar,” know that a brown-sugar formula is a different recipe, not a casual one-for-one swap.
Brown sugar can change sweetness, moisture, and flavor, so swapping it without changing anything else may affect the result. I recommend following this ingredient list for the dependable texture it is designed to make. Once your ingredients are ready, prep the zucchini so its moisture stays useful in the batter.
How should I prep the zucchini?
A small or medium zucchini can go straight to the grater, skin and all. Grate it with the large holes of a box grater, and keep the liquid that collects with the shreds.
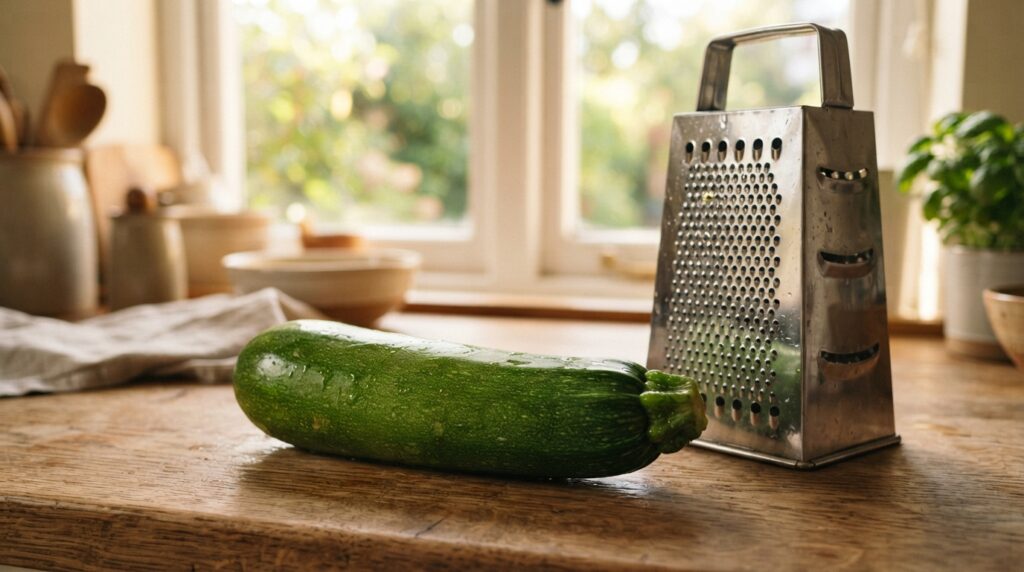
Grate small or medium zucchini as-is
Small and medium zucchini do not need peeling before grating. The skin softens as the loaf bakes, and leaving it on saves time. Is zucchini better with or without the skin? For most small or medium squash, skin-on zucchini is usually the better choice.
Measure grated zucchini by volume rather than weight. Its weight can vary with freshness, shredding size, and how firmly you pack it into a measuring cup. A level volume measure gives you a more useful guide for this batter than a scale reading.
Do not squeeze the grated zucchini dry. Its moisture helps keep the loaf soft, and removing that liquid takes away moisture the batter needs. If a little liquid settles in the bowl, add the zucchini and its liquid together.
Handle oversized garden zucchini differently
An extra-large garden zucchini may have thick skin and large seeds. Peel it if the skin feels tough, then scrape out the seeds before grating the flesh. Those changes help keep the finished texture pleasant instead of leaving firm skin or large seed pockets in a slice.
Use the large holes of the box grater for the prepared flesh. Smaller shreds can disappear into the batter, while larger shreds may remain more noticeable after baking. Either way, measure by volume and avoid pressing out the liquid.
When zucchini is very large, its interior can be softer and more watery than a small squash. Keep the grated flesh and its natural moisture, but do not add extra liquid from a puddle left behind. With the zucchini grated and its moisture intact, move on to mixing the batter gently.
How do I make Zucchini Bread?
Start by preheating the oven, then keep the wet and dry mixtures in separate bowls until each is ready to combine. This order makes the baking soda and other dry ingredients easier to distribute evenly.
Use a medium bowl for the dry ingredients and a large bowl for the wet ingredients. Have the prepared zucchini and optional nuts nearby, so you can stir the batter briefly once the bowls meet.
Whisk the wet and dry ingredients separately
Follow the steps in order, and keep the mixing gentle once you add the flour mixture. The goal is an even batter, not a perfectly smooth one.
- Preheat the oven to 350°F. Whisk the flour, sugar, baking soda, cinnamon, and salt together in a medium bowl. Break up any small flour clumps as you whisk, so the dry ingredients are evenly combined.
- Beat the eggs in a large bowl. Mix in the zucchini, oil, and vanilla until the wet ingredients look evenly blended. The zucchini may make the mixture look textured, and that is fine.
- Add the dry ingredients to the wet mixture. Stir just until the dry ingredients disappear into the batter. Stop before the batter becomes smooth from extra mixing, since that can make the baked loaf dense.
- If you are using walnuts or pecans, add them while you stir in the dry ingredients. Fold them through with a few gentle strokes. Divide the batter between the prepared pans, keeping the amount in each pan as even as you can.
- Bake for 50-60 minutes. Start checking near the shorter end of that range, since ovens can vary. Insert a toothpick into the center of each loaf. The toothpick test, not the timer alone, determines doneness.
Fold the batter and divide it between the pans
When you add dry ingredients, use a spatula or spoon and scrape along the bottom of the bowl. Pockets of flour can hide there, so a few careful folds help bring everything together. Stop as soon as you no longer see dry flour.
The batter will be thick and may look slightly lumpy. That is a normal quick-bread texture. Optional nuts go in at this point, so they spread through the loaf without needing extra mixing. Divide the batter evenly to help both loaves bake at a similar pace.
Bake, then cool before slicing
Check the center of each loaf with a toothpick. When it comes out clean, with no wet batter clinging to it, the center is baked through. A few moist crumbs may cling to the toothpick, but visible raw batter means the loaf needs more time.
Let the loaves cool in their pans for 5 minutes. Then transfer them to a wire rack to cool further. This short rest helps the loaves release without breaking, while the rack lets air move around their sides and bottoms.
Give the loaves time to cool before cutting. A very warm loaf can seem gummy or crumble under a knife, even when it is baked through. Once the loaves are cooling, use a few simple checks to avoid the texture problems that can still trip up a quick-bread baker.
What keeps each slice tender instead of dry?
A dry or heavy slice often points to a small process issue rather than a complicated recipe. Gentle mixing, careful measuring, and a proper center check make a real difference.
Quick-bread batter can turn dense when it is overmixed. Stir only until the dry ingredients disappear, then stop. That brief mixing keeps the loaf from developing a tight, heavy crumb.
Prevent a dense or dry crumb
This recipe uses baking soda, not baking powder. Do not add both leaveners just because another bread recipe calls for baking powder. They are not interchangeable by assumption, and adding more can upset the balance of the batter.
If you are curious about how baking soda works in another quick recipe, these pancakes made without baking powder use an acid-and-base reaction to create bubbles. For this loaf, stick with the leavener listed in the recipe. The best safeguard is following the measured ingredients and avoiding extra mixing.
Keep these checks in mind as you work:
- Measure flour without packing it into the cup.
- Keep the zucchini’s natural liquid in the batter.
- Stop stirring once the ingredients are just combined.
- Test the center for wet batter before removing the loaf.
Check the center without overbaking
A zucchini bread recipe moist enough to stay tender still needs its center baked through. Use a toothpick in the middle of the loaf, where the batter takes longest to set. A clean toothpick, with no wet batter, is a clearer doneness cue than surface color alone.
If the toothpick comes out with wet batter, return the loaf to the oven and check again after a little more baking. Do not judge the center only by the edges or by the timer. A tender crumb should feel moist, not raw or sticky in the middle.
Once you recognize a properly baked crumb, you can play with flavor without losing the loaf’s structure.
Which mix-ins and recipe variations work?
A handful of chocolate chips or chopped nuts can make a familiar loaf feel new without asking you to learn a different method. Keep additions modest so they do not overwhelm the batter or make each slice feel crowded.
Different zucchini bread recipes may use different spices or sweeteners, but a flavor variation does not automatically require changing the base method. Choose one or two additions and let the cinnamon and mild squash flavor remain noticeable.
Which add-ins fit the batter?
These options bring different flavors and textures. Pick the ones that suit your household, or leave the batter plain.
- Walnuts or pecans add a familiar crunch.
- Chocolate chips make the loaf sweeter and more dessert-like.
- Raisins or currants add chewy fruit in small bites.
- Chopped apple brings a fresh, mild fruit flavor.
- Dried cranberries add tartness alongside the cinnamon.
There is no need to pile in every option. Too many add-ins can distract from the loaf’s soft crumb, and generous amounts can make the batter harder to divide evenly. Chocolate chips are an easy choice if you want a sweeter slice; nuts suit a more traditional breakfast loaf.
What makes an old-fashioned version?
Old fashioned zucchini bread often means a cinnamon-warmed, nut-studded style. It is a flavor direction, not a separate required method. Walnuts or pecans fit naturally, but you can leave them out without changing how the batter is made.
If you enjoy experimenting with other quick bakes, try this gluten-free banana bread recipe for another moist loaf with optional chocolate chips or nuts. It uses its own formula, so treat it as a separate recipe rather than a direct swap for this batter.
Can this be a healthy-style loaf?
People searching for a zucchini bread recipe healthy can adjust the flavor to suit their preferences, but this is still a sweet quick bread. Zucchini adds moisture and a mild squash flavor; it does not turn a sweet loaf into a health food.
You can skip the chocolate or nuts if you prefer a simpler slice, or add fruit for a different taste. Keep changes to flavor additions rather than making untested changes to the flour, sugar, or oil. After choosing any add-ins, select the pan and oven setup that matches the recipe.
Which pan and oven setup should I use?
Before the batter goes into the oven, check the pan size rather than reaching for the loaf pan you use for every other recipe. This recipe is designed for two 8 x 4-inch loaf pans, not 9 x 5-inch pans.
Grease each pan or line it with parchment paper for easier release. A different pan size can change how high the batter sits and how quickly the center bakes, so the listed size matters.
Choose the right loaf pan
Use two 8 x 4-inch pans for the intended shape and bake. A 9 x 5-inch pan is wider, so the same amount of batter spreads differently. Do not assume that your usual pan will give the same result simply because it is also called a loaf pan.
Greasing the pans helps the loaves release, and parchment offers another easy option. If you line the pans, leave enough paper at the sides to lift the cooled loaves out. Set the pans on a stable oven rack with space around them for heat to circulate.
Does this recipe need high-altitude changes?
No tested high-altitude adjustment is provided for this zucchini bread recipe. Searches for “zucchini bread recipe high altitude” may turn up general tips, but do not invent a temperature or ingredient change for this particular batter.
At elevation, baking can behave differently, and the right adjustment depends on your location and the recipe. Use a locally tested quick-bread adjustment rather than guessing at the flour, liquid, or oven temperature. Check the center for doneness, since a properly baked middle matters at any elevation.
With the pans sorted, turn to storing any loaf that will not be eaten right away.
How should I store or freeze extra slices?
If you plan to finish the loaf in the next couple of days, wrap it well and keep it at room temperature. This moist bread stays at room temperature for up to 2 days.
For longer storage, refrigerate or freeze the loaf. Let it cool completely before freezing, so trapped warmth does not collect inside the wrapping.
Keep the loaf for the next couple of days
Once the bread has cooled, wrap it well and keep it at room temperature for up to 2 days. Choose a spot away from direct heat or sunlight. If you know you will keep it longer, refrigerate or freeze it rather than leaving it out.
For a loaf you plan to refrigerate, wrap it to help protect the cut surface from drying out. Keep the wrapped bread chilled, and take out only what you plan to eat. A cool loaf may feel firmer than one at room temperature, so let a slice sit briefly before serving if you prefer a softer bite.
Freeze slices for longer storage
Cool the loaf completely before freezing. Wrap individual slices in plastic wrap and then aluminum foil. Place the wrapped slices in a zip-top freezer bag, press out extra air, and seal it closed.
Frozen zucchini bread can be kept for up to a year. Freezing slices makes it easy to thaw only what you want, rather than defrosting a whole loaf. Label the bag with its contents so you can spot it easily in a full freezer.
When you are ready for a slice, take out only the portion you plan to enjoy and let it thaw. If the loaf is still warm when wrapped, moisture can collect inside, so complete cooling is worth the wait. Once you have a plan for leftovers, choose a simple way to enjoy or share the finished loaves.
How can I serve and share a fresh loaf?
Two loaves make it easy to keep one close and share the other. The recipe yields two loaves and 24 servings, with 15 minutes of listed preparation time.
Serve slices for breakfast, a simple snack, or dessert. The cinnamon flavor works at the table without needing a complicated topping or extra prep.
- Serve a warm slice for breakfast.
- Set out slices for an easy afternoon snack.
- Wrap a whole loaf to give to a friend or neighbor.
- Set one loaf aside for later and enjoy the other now.
If you are planning a brunch, the loaf also pairs well with a savory dish. These quiche recipes for brunch offer another option for a spread with both sweet and savory choices.
You do not need a special occasion to bake both loaves. Share one, keep one nearby, or offer slices when family drops by. When zucchini is ready in your kitchen, this is an easy recipe to put to use.
Conclusion
A soft, warmly spiced loaf is within reach with a few familiar ingredients and an easy mixing routine. Keeping the zucchini’s moisture and mixing gently are the simplest ways to protect a tender result.
You do not need to wait for a perfect baking day or a special occasion. Grate the zucchini you have on hand, set out your ingredients, and give the batter a gentle stir. The two-loaf recipe makes sharing simple, but keeping both loaves is fine too.
Let the bread cool enough to cut cleanly, then enjoy a slice while the cinnamon is still fragrant. Bake a loaf when zucchini is ready, and enjoy that first tender slice.
FAQ
When making zucchini bread, do you remove the peel?
Can you use yellow squash instead of zucchini?
Why is zucchini bread so good?
Can I make zucchini bread without nuts?
How long does homemade zucchini bread stay fresh?
Related Recipe :
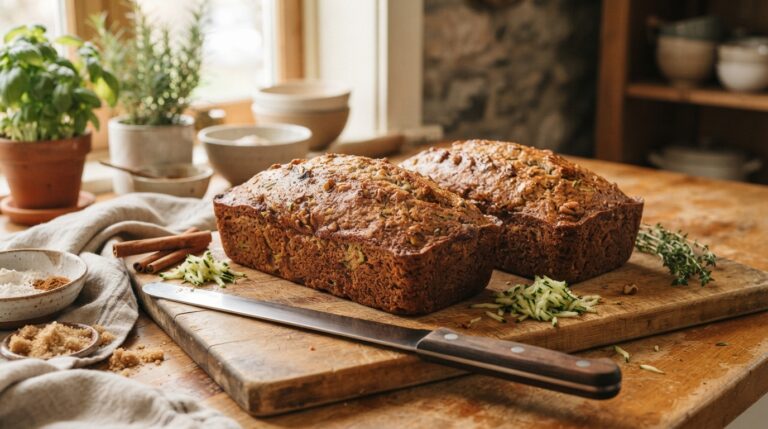
The Ultimate Zucchini Bread (Moist, Tender, Never Dry!)
Overnight Oats Recipe: 7 No-Sugar Options That Still Taste Amazing

Garlic Butter Shrimp Recipe: 7 Best Ways to Make It Perfectly

Egg Fried Rice Recipes: 7 Best Ways to Make It Perfectly

Fish Recipes: 10 Easy Dinners the Whole Family Will Love